what’s new
- Open and closed hand
- Curved fingers
- Flexible wrist
what’s important
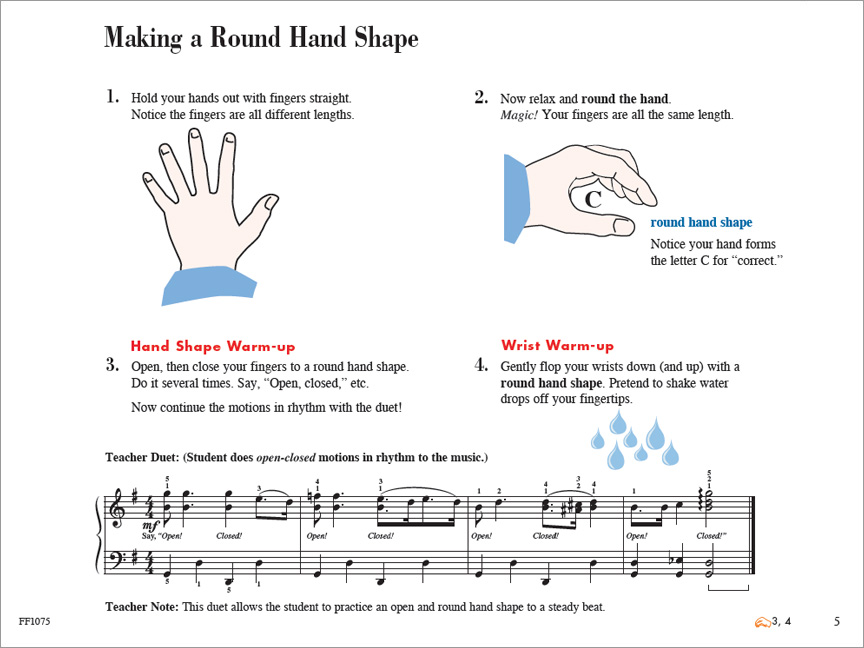
- Making a round hand shape
- Using a flexible wrist
- Learning Technique Secret 2
studio supplies
-
These items may be useful to promote a round hand shape
- a tiny race car
- a cotton ball
let’s get started
Put your left (or right) hand straight out in front of you. Which finger is the longest? The shortest?
We can do a “magic trick” to make all the fingers the same length. (Demonstrate a round, curved hand position.)
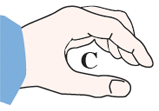 Curve your fingers to make a C. Now your fingertips are in a line. Magic!
explore & create
- Hand Shape Warm-up
Open (fingers straight) and close your hand into a C shape. Let’s practice this together: open-close-open-close. Keep doing this in rhythm while I play some music. (Play the Teacher Duet given.)
see video  Wrist Warm-up
Let your hands hang over the keys like you’re holding two apples. Now “drop the apples” and pretend you’re waving good-bye with a gentle wrist motion. Pretend to shake water drops off your fingertips. Feel your relaxed wrists!
see video
 Review:
- NEW: Technique Secret 2: ROUNDED HAND SHAPE (p. 4)
Exercise: Blooming Flowers
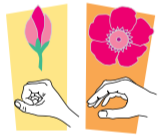 Watch my hand. Silently show the motion of Blooming Flowers. What happened to my hand?
Present Rounded Hand Shape as Secret #2 with the Exercise called Blooming Flowers.
Do the motions together. Consider placing a tiny toy underneath each hand to check for a rounded hand shape.
pedagogy pointers
Developing a curved and relaxed hand shape is an important first step to build a student’s technique. It will take many gentle reminders before this hand position becomes second nature. However, the sooner the process is begun, the better the chance of succeeding!
It is also equally important to help your student develop a flexible wrist. Analogies like waving goodbye or shaking drops off the fingertips are easy ways to introduce this concept. Playful and gentle reminders combined with careful observations (on your part) will help foster a natural flexibility.
